
|
In this tutorial, we will install a device model library. For this exercise, we have supplied a model library file - TUTORIAL3.MOD - with just two devices. These are:
SXN1001 - an NPN bipolar transistor SXOA1000 - an opamp.
Both are totally fictitious.
You will find this file in the tutorial folder i.e. Examples/SIMetrix/Tutorials/Tutorial3.mod. There are two aspects to installing a model. SIMetrix needs to know where within your file system, the model is located. If the model is to be listed in the model library browser system, then SIMetrix also needs to know what symbol to use for it in the schematic and what category it comes under. This is how you do it:

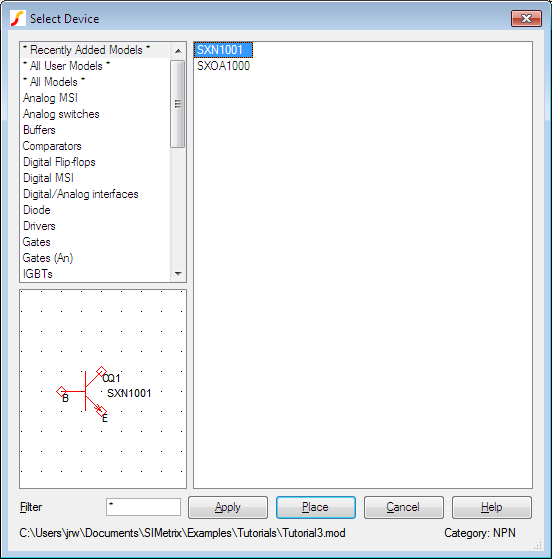
At this stage, SIMetrix knows where to find our fictitious devices. You will find that it also knows about the NPN transistor as the following demonstrates:

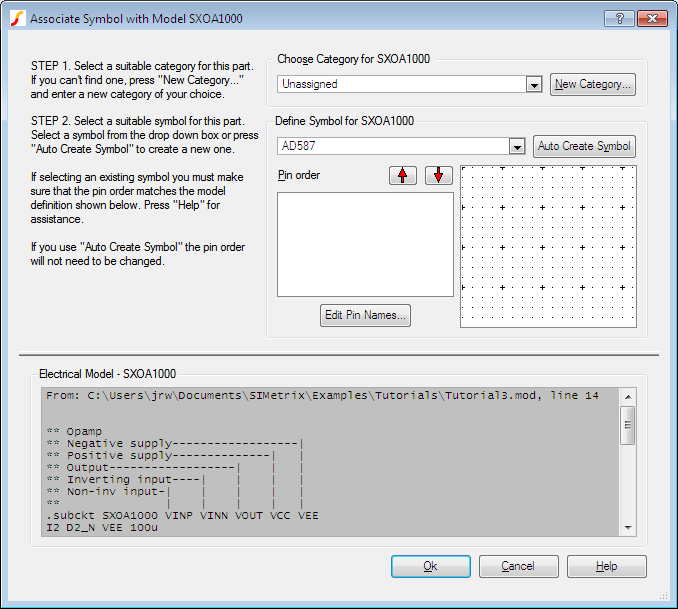
This is not the case with the other device in the model library. This is an opamp and is defined as a subcircuit. This is a module made up of other parts, in this case BJTs, diodes, resistors and current sources. SIMetrix can't tell what type of device this is. It knows that it has five terminals and it knows where the electrical model is located in the file system, but it doesn't know what schematic symbol to use for this model.
SIMetrix will ask you for this information when you try and place it. Follow this procedure:

| Pin name | Function |
|---|---|
| INP | Non-inverting input |
| INN | Inverting input |
| VSP | Positive supply |
| VSN | Negative supply |
| OUT | Output |
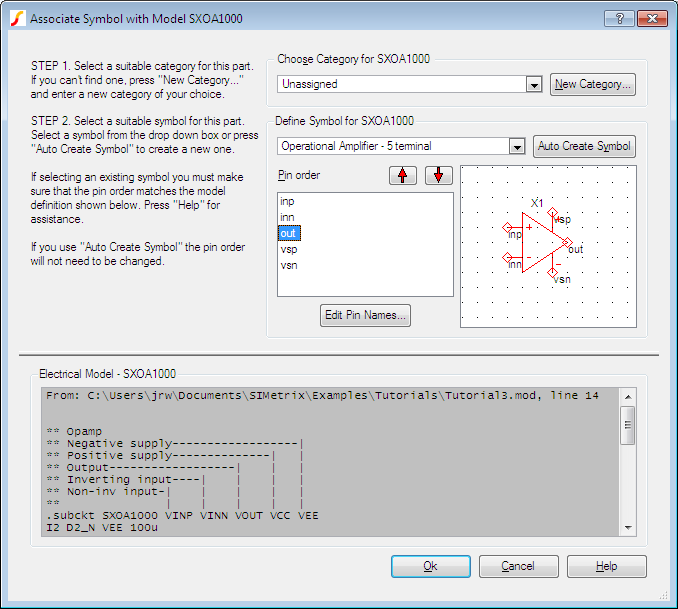
The text at the bottom of the dialog box shows the actual subcircuit definition. Fortunately, it has been annotated with the function of each of the sub-circuit's terminals. (This is in fact usually the case with third-party models). As you can see, the output terminal is in the wrong place. We can change the pin order using the Pin order up and down buttons:

You will not always need to execute the above procedure to associate models and symbols even for subcircuit devices. SIMetrix is supplied with a data base of over 40000 devices that are already associated. These are devices for which SPICE models are known to be available from some third party source. This database is in the file all.cat which you will find in 'support\ devdb' directory. The information you enter in the associate models dialog is stored in a file called user_v2.cat which you will find in devdb/user under the application data directory - see Application Data Directory.
You will also not need to perform the above procedure for many 2 and 3 terminal semiconductor parts even if they are not listed in the all.cat database. SIMetrix runs a series of simulations on these models and attempts to determine what the device type is from their results. If successful, the 'association' step demonstrated above will be skipped.
Finally, there is a method of embedding association information within the model itself, and such models will not require manual association. The embedding method is described in Embedded Association.
|