Advanced SIMPLIS Training
|
In this Topic Hide
In this topic, you will learn three ways that you can customize the SIMetrix/SIMPLIS user interface:
How to configure portions of the UI with global options
How to perform specific tasks using the menu options
How to use keyboard shortcuts to execute menu items
To get started, you will set some global options that will help with this course material. Many of these options will also help in your day-to-day work with SIMetrix/SIMPLIS. Once set, the global options persist and are defined to configure SIMetrix/SIMPLIS every time you use the program.
To edit the global options, follow these steps:
From the command
shell menu, select File Options
General.
Result: The Options/Preferences Dialog
opens to the Schematic Editor tab:
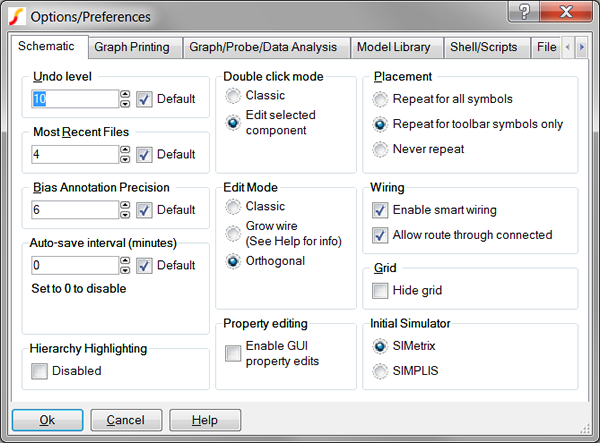
In the Initial
Simulator box in the lower right corner, click the radio button in
front of SIMPLIS .
Result: Each new schematic will now use the SIMPLIS simulator.
Existing schematics are unaffected.
In the Property
editing box in the lower center, check Enable
GUI property edits.
5 Result: This option allows you to double click on any visible
symbol property to edit that property. The Options/Preferences dialog
should now look like the following:
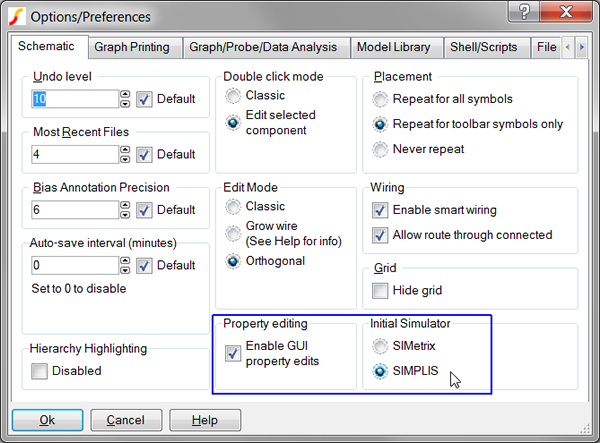
Click Ok to accept the dialog and
save the options.
Result: The dialog closes, and SIMetrix/SIMPLIS
saves your preferences.
In this section, you will change the default text editor from Notepad to Notepad++. If you don't currently have Notepad++, you can download the program from the here.
From the SIMetrix/SIMPLIS command shell menu, select File
Options General.
Result: The Options/Preferences Dialog
opens to the Schematic Editor tab with your changes displayed from the previous section.
To change the editor, click the File
Locations tab. If it is not visible, first click the right
arrow on the tab bar to bring the tab into view.
Result: The default File Locations tab opens with your default
paths and programs.
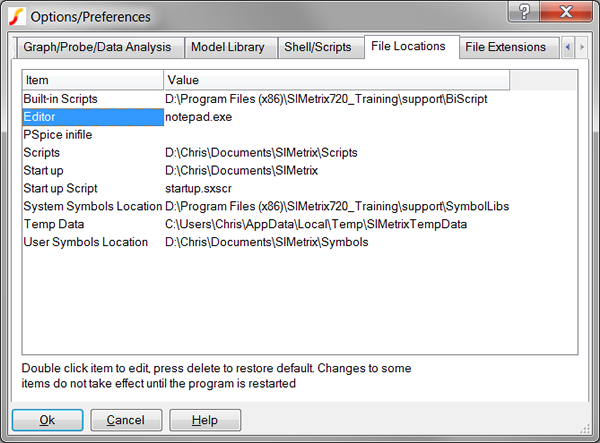
To change the editor to Notepad++, double click on the Editor Item.
Result: An Explorer window opens for you
to select the Notepad++ executable.
Navigate to the location where Notepad++ is installed, which is typically C:\Program Files (x86)\Notepad++\notepad++.exe.
Select the notepad++.exe
file, and click Open.
Result: The options dialog is updated to
show that the new editor is Notepad++.
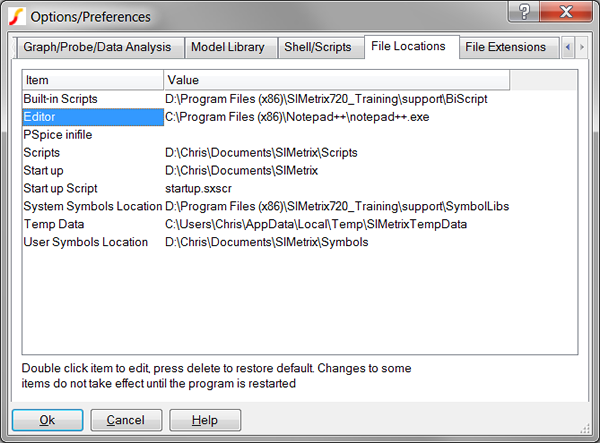
Click Ok to save the
options.
Result: The dialog closes, and SIMetrix/SIMPLIS
saves your preferences.
Included with this course material is a file containing the Notepad++ user-defined languages. This is a text file in XML format which identifies two languages for SIMetrix/SIMPLIS:
To install this file, follow these steps:
Click on the following link to open the userDefineLang.zip file.
On the resulting dialog, select Open
with Windows Explorer.
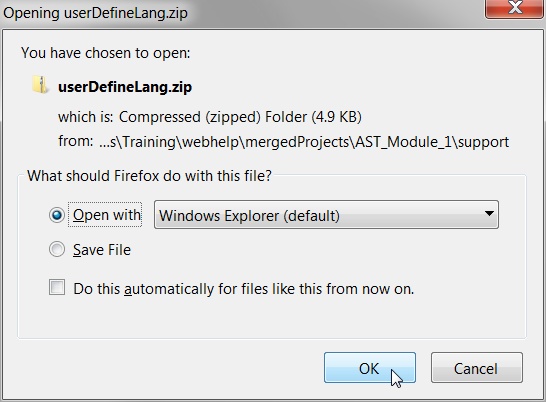
On the Explorer window, select Extract
all files.

Extract the file to your desktop.
Open Notepad++.
From the menu bar in Notepad++, select Language
Define your language...
Result: The User Defined Language dialog
opens:
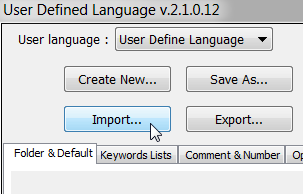
Click the Import...
button.
Result: An Explorer window opens
for you to select the previously saved user-defined language file.
Navigate to your desktop, and select the userDefineLang.xml file.
Click Open.
Result: An "Import successful."
dialog is displayed.
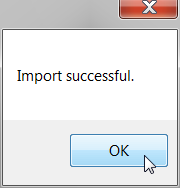
Click Ok.
Close the User Defined Language Dialog using the red "X" in the upper right hand corner of the dialog.
Close Notepad++.
The next time you open Notepad++, the user-defined languages listed in the userDefineLang.xml file will be used. During the import process, Notepad++ makes a copy of the user-defined language file and saves this to your AppData directory. You can, therefore, safely delete the userDefineLang.xml file from your desktop.
At this point, you have personalized your SIMetrix/SIMPLIS installation to use a few custom options. Next you will consider how the user interface is constructed and how you can further modify the user interface to better suit your personal needs.
Every menu item and keyboard shortcut is implemented with the SIMetrix/SIMPLIS script language. The menus you see on the different windows are not a permanent part of the program but are created from scratch every time the program starts. This gives you a great deal of flexibility in adding new menu items as well as moving or deleting existing menu items.
In this exercise, you will reassign the "Ctrl+S" keyboard shortcut to save the current schematic. By default this shortcut key shows the node name under the mouse cursor.
From the SIMetrix/SIMPLIS command shell menu, select File
Options Edit Menus...
Result: The Edit Menu System dialog opens
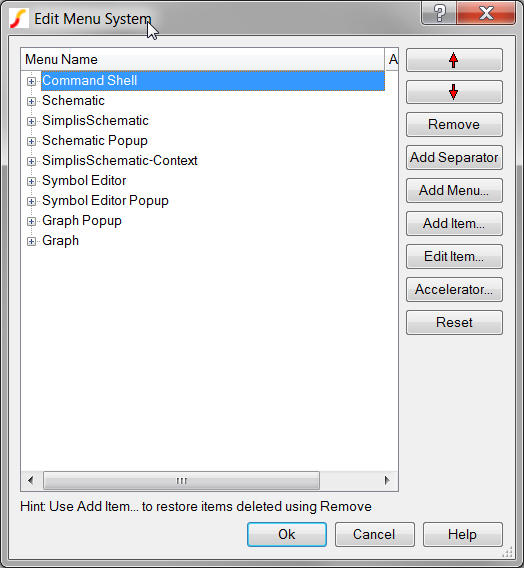
Click the "+"
in front of the SimplisSchematic
item.
Result: The SIMPLIS schematic menu items
appear, starting with File, then Edit, etc...
Click the "+" in front of the &File item.
Click the &Save
item.
Result: The dialog should now look as follows:
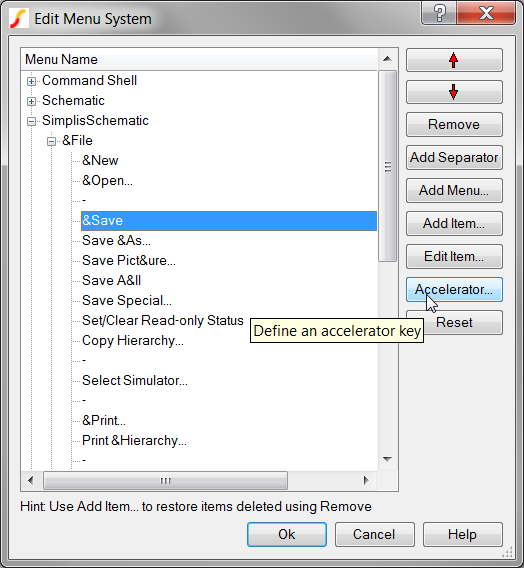
Click the Accelerator...
button.
Result: The Rebind Key dialog appears:
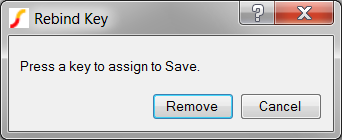
Press and hold the Ctrl
key while pressing the S key.
Result: The Warning - binding &Save
dialog appears:

Click Ok.
Result: Your new key binding has been saved.
To verify the new key binding:
Open a schematic with the command shell menu, File New Schematic.
Press Ctrl+S.
Result: The File Save As dialog opens
because the schematic is untitled. If you had previously saved the
schematic, the schematic would save without prompting for a filename.
Every menu item or keyboard shortcut executes either a SIMetrix/SIMPLIS script or a simple script command. A script file is a sequence of commands or calls to other scripts. The user interface is built from a set of approximately 900 scripts. Here is a short example using the edit_options.sxscr script:
Type edit_options into the command line of the SIMetrix/SIMPLIS
command shell.
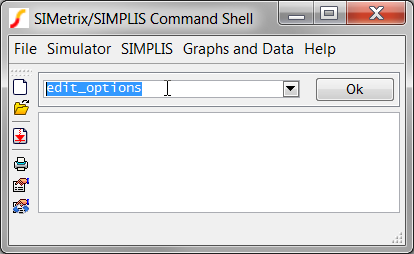
Press Enter or click
Ok.
Result: The Options/Preferences dialog
opens exactly as if you had selected File
Options
General from the command shell menu.
The edit_options script is a built-in script and can be downloaded in another browser window by clicking here.
From a functional point of view, there is no difference between using the menu item, the keyboard shortcut (if there is one) or hand-typing the script name into the command line. These user interface scripts are called Built-In or BiScripts and can be downloaded from the ERROR: Variable (download_links_page) is undefined. page.
Note: You will need an in-maintenance license to access the script source.
In this section, you have used the Edit Menu System dialog to modify the user interface. In the next section, 1.2.2 Customizing the User Interface, you will download and install a set of scripts specially prepared for this training session. These scripts automate the process of setting keyboard shortcuts and further extend the functionality of the user interface.
© 2015 simplistechnologies.com | All Rights Reserved