3.1 Set up a Transient Simulation
This section of the tutorial shows you how to set up a transient simulation for a synchronous buck converter.
In this topic:
Key Concepts
This topic addresses the following key concepts:
- The SIMPLIS transient analysis is similar to the transient analysis available in other simulators, but it runs much faster.
- Although the analysis settings are almost identical to SPICE transient analysis settings, the math used in each simulator is vastly different. This allows SIMPLIS to simulate circuits much faster than SPICE.
What You Will Learn
In this topic, you will learn the following:
- How to set up the buck converter to run a basic transient analysis.
- How to enlarge a graph and zoom in and out to examine it more closely.
3.1.1 Specify the Transient Analysis Settings
To set up the transient simulation, follow these steps:
- Open the schematic that you saved after editing the component values in 2.2 Edit Standard Component Values
or
open 2_SIMPLIS_tutorial_buck_converter.sxsch. - From the menu bar in the Schematic editor, select .Result: The Choose SIMPLIS Analysis dialog opens with three tabs:
- Periodic Operating Point
- AC
- Transient
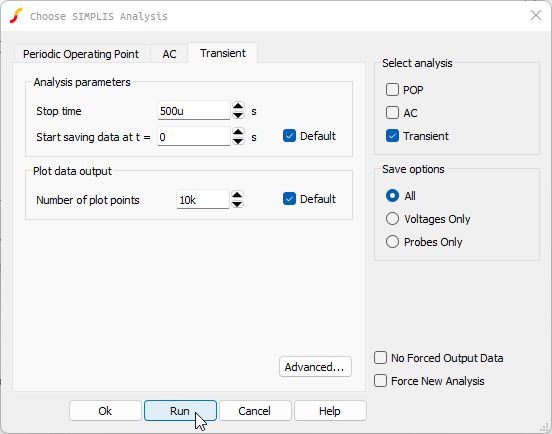
- Click the Transient tab, and change three settings that to run a transient
simulation from 0 to 500μs and to save all node voltages on the top level of the
schematic.
- In the Select analysis section on the upper-right side of the dialog box, click the check box in front of Transient.
- In the Analysis parameters section, set the Stop time to 500u.
- In the Save options section, click the radio button in front of
All.Result: The Transient tab should now look like this:
- At the bottom of the dialog, click Run. Note: If you have already selected Ok or pressed Enter, press the keyboard shortcut F9.Result: The simulation executes and the waveform viewer window opens with curves for the three probes.
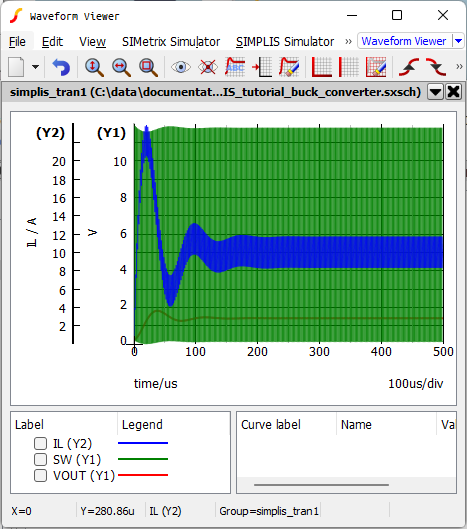
- To examine this graph more closely, enlarge the window and use the following tips
for zooming in and out on the data:
- To zoom in, press and hold the left mouse button and drag a rectangle around the graph area.
- To zoom out, press the Home key.
- To return to the previous zoom factor, type Ctrl+Z.
Note: In the first two Chapter 4 topics (4.1 Output Curves to Separate Grids and 4.2 Reorder the Graph Grids), you will
learn more about manipulating the graph output to make the graphs easier to read.
3.1.2 Save your Schematic
To save your schematic, follow these steps:
- Click anywhere in the schematic to bring the schematic viewer in to focus.
- Select .
- Navigate to your working directory where you are saving your schematics.
- Name the file 3_my_buck_converter.sxsch.
A schematic saved at this state can be downloaded here: 3_SIMPLIS_tutorial_buck_converter.sxsch.