Schematic Grouping
Grouping allows the user to interact with a set of elements as if they were interacting with a single element. Any selection of elements can be grouped together and doing so allows the user to subsequently only have to select one of the elements to cause them all to be selected.
To group together a set of elements:
- Select the elements to group together.
- Right click and select menu item Group Selected, alternately .
To ungroup a set of elements:
- Select the group.
- Right click and select menu item Ungroup Selected, alternately .
There can be multiple levels of grouping. For example two sets of elements can be grouped individually into Group A and Group B. Later, the two groups can be grouped together to form Group C. To ungroup, either the grouping levels can be ungrouped individually, so for example, Group C ungrouped to leave Group A and Group B, or the entire grouping can be removed by using menu .
Group Breaking
If an element is moved onto a group, or a group is moved onto another element, the grouping will break. As shown in the figure below, a visual indicator will be shown whilst elements are being dragged warning if a group will be destroyed if the drag ends in that state.
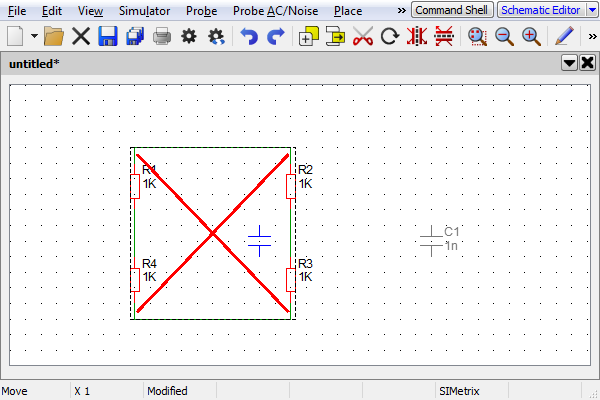 |
Moving an element into a group with warning of group destruction. The wires and resistors have been grouped together. The capacitor is being dragged over the grouping. A warning box with a red cross appears around the group to indicate that placing the capacitor here would break the grouping of the elements. |
| ◄ Schematic Styles | Schematic Printing ▶ |