1.2.2 Customizing the User Interface
In the previous topic, 1.2.1 Introduction to the SIMetrix/SIMPLIS User Interface, you learned how to configure SIMetrix/SIMPLIS using the built-in GUI dialogs. These dialogs allow a limited amount of customization - mostly adding keyboard shortcuts or moving and deleting menu items. In this topic you will learn how scripts can be used to customize the user interface and that using scripts there is almost no limit to what can be customized. Sample scripts which add new menus, keyboard shortcuts, and functionality are included in the course material.
In this topic:
What You Will Learn
How to further customize and add functionality to the SIMetrix/SIMPLIS user interface using scripts included with the course material.
Getting Started
Included with this course is a set of scripts which add functionality and add shortcuts to existing functions. These scripts are included in the training_scripts.zip file. In the next section, you will install these scripts.
Installing the Training Scripts
When you run a script, SIMetrix/SIMPLIS searches for the script file in a limited set of directories. One of these directories is your personal script directory, so for the training scripts, you will save the scripts to this directory. The full file path to your personal script directory is set in the Options/Preferences dialog. To find the location of your personal scripts directory, follow these steps:
- From the menu bar, select:
- Navigate to the File Locations tab as shown below.Result: The dialog should appear as follows, but with file paths for your machine:
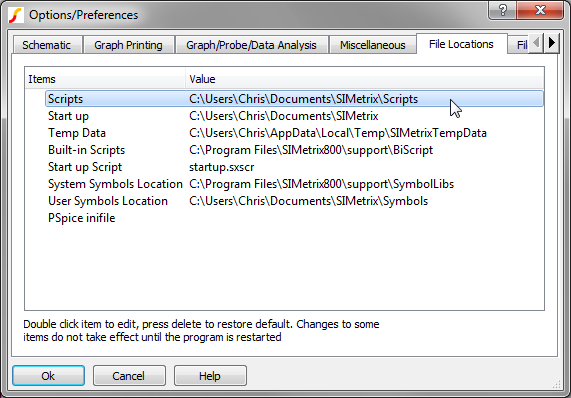
- Find the Scripts item in the first column. The text in the second column, with the header Value is the full path to your personal scripts directory, in the above dialog, C:\Users\Chris\Documents\SIMetrix\Scripts.
- Unzip the training_scripts.zip archive to the directory indicated by
the Scripts item in the Options/Preferences dialog. If the Scripts
directory doesn't exist, create it.Important: SIMetrix/SIMPLIS only searches the Scripts level for your personal scripts. Scripts in sub directories will not be found by the program. When unzipping the archive make sure the four scripts are located in the Scripts directory.
At this point, You should have the four scripts files from the zip archive in the Scripts directory, along with the startup.sxscr script. All that is left is to tell SIMetrix/SIMPLIS to execute one of the training scripts when the program starts.
When you start SIMetrix/SIMPLIS, the program runs your personal "startup" script. This is script can be used to customize the user interface by adding keyboard shortcuts, menu items, etc. Your personal startup script has the name startup.sxscr and is located in your personal scripts directory. Although you probably haven't edited this script, the program installer created it when you first installed the program.
Changing which Script is Executed at Startup
The zip file has a special training startup script. This implementation was chosen because it doesn't overwrite any changes you may have made to your startup script. All you need to do is tell SIMetrix/SIMPLIS to use the training_startup.sxscr instead of your personal startup.sxscr script.
- From the menu bar, select .
- Navigate to the File Locations tab as described in 1.2.1
Introduction to the SIMetrix/SIMPLIS User Interface. The dialog should
appear as follows, but with file paths for your machine :
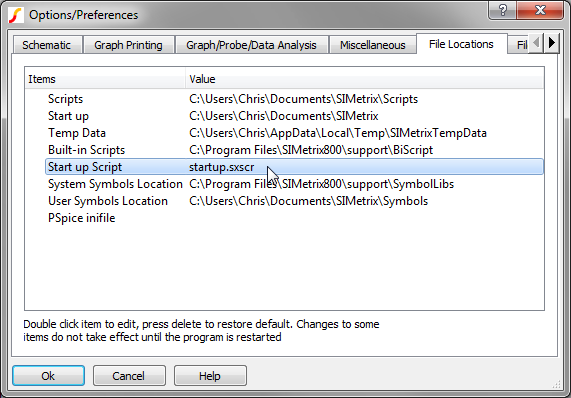
- Double click on Start up Script. Result: A dialog appears to allow you to change the name of your startup script.
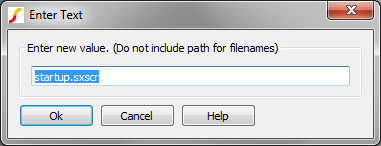
- Change the startup script name to training_startup.sxscr.
Important: Exact spelling is mandatory!
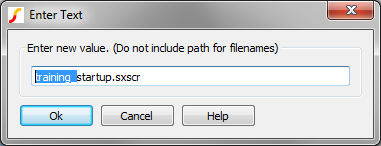
- Click Ok. The Options/Preferences dialog now shows the Start up Script
item has the Value training_startup.sxscr.
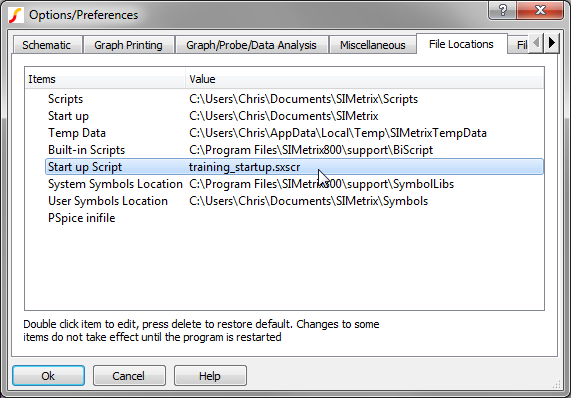
- Click Ok on the Options/Preferences dialog.
- Close and restart SIMetrix/SIMPLIS. In the command shell you should see the following additional text:
Training Startup Script Executed Cleanly
At this point you have successfully installed the scripts included with the training material. If you didn't get the Training Startup Script Executed Cleanly message, go back and see if you have the correct Startup script name, and that the scripts are unzipped to the correct file location. Also make sure you don't have the scripts in a sub directory of the Scripts directory.
Discussion
There are 4 scripts included in the training_scripts.zip file, their file names, functions and a short call hierarchy is described below:
| Script File Name | Function | Called By |
| training_startup.sxscr | Startup Script | The Program at Startup |
| training_startup_menus.sxscr | Adds Menus | training_startup.sxscr |
| training_startup_shortcuts.sxscr | Adds keyboard shortcuts | training_startup.sxscr |
| training_menu_utilities.sxscr | Worker script | Menu items added in training_startup_menus.sxscr |
The training scripts vary in complexity from very simple to fairly complex. The very simplest scripts add keyboard shortcuts and menu items to the user interface. An example of a fairly complex script is training_menu_utilities.sxscr, which is called with a string argument from several menu options added by the training_startup_menus.sxscr script. The training_menu_utilities.sxscr performs the actions for each menu item.
New Shortcut Keys
The script training_startup_shortcuts.sxscr assigns shortcut keys. The shortcut keys, their scope and functions are defined as follows:
| Key | Scope | Menu Item | Function |
| F2 | all | none (custom) | Toggles the echoOn global variable |
| Ctrl+P | Schematic | Opens advanced random probing menu |
New Menu Items
The training_startup_menus.sxscr script adds a number of menu items which expand the functionality of the user interface. Currently, menus are added to the schematic menu and to the context or pop-up schematic menu. Each menu item will be covered when it is first used.
Editing scripts
If you are curious, you can open a script editor window using the . You can then either drag and drop a script file from the Windows explorer window, or use the menu to open a file.
The drag and drop method will open a new script editor is one is not already open.Conclusions and Key Points to Remember
- The SIMetrix/SIMPLIS User Interface is built with a collection of built-in scripts.
- Using your own custom scripts, keyboard shortcuts, menus and additional functionality can be added.